Showing posts with label High River photography. Show all posts

Friday, May 29, 2009

Nikon D90 - Early Thoughts

1946 Mercury 1/2 Ton Truck taken at 1/2000, f/4.8 and ISO 800

I recently sold my Nikon D80 to a friend and replaced it with the new Nikon D90. I haven't had a lot of time to play with it yet, but I wanted to get a few pictures and a video posted. Yes...a video, the Nikon D90 takes HD video in addition to fabulous pictures. Last Sunday morning, I spent a few hours at the Bar U Ranch, south of Longview, taking photos and trying out some of the new features of this camera.

While at the ranch, I came across this character who had two beautiful old trucks on display. The first, is the two-tone custom 1946 Mercury 1/2 ton, pictured above, built on a Camero chassis with a Camero engine. The other truck, below, is a 1947 Mercury and is rebuilt in stock condition.

1947 Mercury 1/2 Ton Truck taken at 1/2000 s, f /4.0, and ISO 800
Looking at old vehicles, talking with this guy and taking photos was a great way to spend a morning. Just before I left, I came across a blacksmith demonstrating how to make horseshoes, so I decided to try out the video feature on the new camera. This video was taken hand-held with my Nikon 18-200 lens. It gives you an idea of what camera can do.


Taking video with the D90 is going to take some getting used to. The video feature has several pros and cons. The pros are; camera and video in one unit, being able to take HD video with awesome Nikon lenses and a shallow depth of field. The cons are; no auto-focus in video mode, a tripod is almost essential, sound quality is just OK. It is pretty cool however to be able to take HD video clips with a digital SLR. I'll post more on the video features in a later post.

My initial impression of the D90 is... I love it. As I've said before, I like the D80/D90 form factor because it is a full-featured digital SLR in a very small and portable body. The D90 has inherited lots of features from the D300 including an improved sensor with much improved noise suppression over the D80. I've lamented in previous posts that my rejection rates with istockphoto were creaping up because of the noise levels with my D80. I'm looking forward to submitting some of my pics from the D90 and see if they get accepted.

Thursday, February 19, 2009

Basketball Photography

18-200 mm lens set to 18 mm, 1/80 sec at f/3.5, ISO 250

It's basketball season so I've spent the last couple of months attending my son's basketball games and trying to figure out how those amazing Sports Illustrated photogs ply their craft. Taking photos of fast-moving action in poorly lit gyms is a definite challenge and does require some specialized equipment. Here's how I did it on a shoestring budget. First of all, I'm a huge fan of David Hobby and his Strobist site. His site is my number one source of information for "off camera" lighting. Over the past year I've purchased two used Nikon speedlights (SB-24 & SB-28) from eBay and a Cactus V2 wireless transmitter and two receivers. I also use lots of gaffers tape and bongo ties. The biggest challenge that I've found is getting enough light on the subject so that I can use a reasonably low ISO with a fast enough shutter speed to stop the action.

The setup:
I like to use my 50 mm f/1.4 lens as it allows me to get close to the action while still using a large enough aperture to blur the background. I've also experimented with my 18-200 mm VR lens, but with less success. In order to provide adequate light I attached the radio trigger receivers to each flash and then used bongo ties to attach one speedlight to the railing of the bleachers, pointing towards the top of the key. The second flash was set up on the opposite side of the
gym in a similar position, but without a railing to fasten it to, I had to use gaffer's tape to fasten it to the wall. Not ideal but it worked. I did get some pretty funny looks from some of the parents in the crowd. Using this setup, and the radio transmitter attached to the camera I was able to get both flashes to fire simultaneously and stop the action on the floor. Even though I had the lighting pretty much sorted out didn't mean it was easy to get great shots. To get really great action shots you need to take lots of photos and spend lots of time practicing in order to get to the point where you can anticipate the action. My respect for the SI guys is huge.

Wednesday, February 11, 2009

Fast 50


My favorite lens, and one that every photographer should have in their arsenal, is a "fast 50." When I bought my digital SLR camera I said no to the temptation of an inexpensive "kit" lens and instead put the money into a 50 mm f/1.4, which cost about $400. Even if you can't afford the f/1.4, you can get a 50 mm f/1.8, which will work just fine, for $140.

Two reasons why you need a "fast 50." First, we all find ourselves in low light situations where a zoom lens, like my 18-200 mm VR f/3.5-5.6, just won't cut it. This past summer when we were in Ireland, we attended the Willie Clancy Traditional Music Festival.
During the day students attend clinics and in the evening all of the pubs fill with musicians and spectators for "sessions." In the dimly lit pubs, by cranking my ISO up to 800 and my aperture on my 50 mm lens opened up to f/ 1.4 to 2.0, I was able to capture some decent images. These photos wouldn't ever be accepted on iStock, but I'm very glad I have these images captured.

The second reason that the "fast 50" is a must have lens, is because it gives the photographer the ability to use a very shallow depth of field and throw the background into a soft creamy blur. This technique really makes the subject seperate and stand out from the background. If you don't have a "fast 50", this is the next piece of gear to add to your kit.

Monday, February 9, 2009

My Workflow


Young couple enjoying the view of Athens from the Acropolis

Back in the days of 35 mm film, my workflow consisted of clicking the shutter 36 times, removing the roll of film, sending it off to the lab for processing, and upon return, sorting the "keepers" from the "rejects." The rejects went into the garbage and the keepers were numbered and filed in a slide box. I always had intentions of entering each slide into a database, but the task was too daunting so it never happened.
My digital photography is a bit more involved. After clicking the shutter, here's what I do:
  1. When I get home from a shoot, I remove the memory card from my camera and use a card reader to move the images onto my computer. I use a card reader rather than connecting the camera directly to the computer with a USB cable because it reduces wear and tear on the camera's USB port and it doesn't drain the camera battery.
  2. The majority of my workflow is done within Adobe Photoshop Lightroom. In Lightroom I use the "Import" feature to move the RAW files from my camera's memory card to the designated folder on my computer. I still use DVD's to back-up all of my images. A DVD has a maximum capacity of 4.2 GB so I never let a folder get larger than this size. I label each folder as SKJ_DVD##. When a folder gets close to 4 GB I create a new folder. All of these folders are contained within a folder I've entitled "Image Vault."
  3. Lightroom is great because it automatically creates date specific folders within my Image Vault folders. At the time of import I also add my copyright information and if all images are of similar content, I add content keywords at the same time. Adobe has created awesome tutorials for each stage of the process from import to export.
  4. Once a batch of images are imported into Lightroom, I use the "Library" module to begin the sorting process. I scroll through each photo and use the 'x' key to flag all reject photos. I only reject photos that are totally unuseable, ie. out of focus, dramatically overexposed or under exposed. After my initial pass I delete all of the rejects...I delete them out of my Lightroom library and off my hard drive. Gone. On my second pass through the batch of images I begin to select the best photos by using the 'p' key which adds a "pick" flag. Once I've got my best images selected, I move to the "Develop"module to make image adjustments.
  5. The tools in the develop module are arranged in order from top to bottom, in the recommended order that they be used. I sometimes jump around a bit, but typically I adjust the exposure, white balance, crop if needed, and finally boost the blacks and the clarity.
  6. If I am planning on using the image for iStock, I export the image in full size format and save it in .jpg format. I then close Lightroom and open up another program, Noise Ninja. Even at ISO 100, my Nikon D80 has some noise which has caused quite a few of my images to be rejected by iStock. After using Noise Ninja, my acceptance rate has greatly improved. After the image has been processed in Noise Ninja I upload the image to the iStock website where I add keywords and categories.
  7. If the images are for a client, I use a plugin within Lightroom to upload the images to my website which is hosted by Zenfolio. I've purchased an account with Zenfolio which allows me to use my own domain name, and upload unlimited images. Zenfolio allows me to create password protected galleries which allow the client to view their images without anyone else seeing them. Zenfolio also has a shopping cart feature which allows me to sell images from my website and add a markup to the prices charged by MPix, an online lab which is affiliated with Zenfolio. I've placed many orders with MPix and have been very pleased with the results. The prices are reasonable and the quality is superb. Images are printed and back to me within two weeks. I especially like their gallery wraps which are printed on canvas.
These are the basics of my workflow. If you want more detail or have specific questions, please ask by leaving a comment below.

Sunday, February 8, 2009

Highwood High School


Back in early fall I was asked if I would be interested in taking some photos of the local high school for use on a school publication. I responded that I would be happy to do so. I got up early one chilly October morning, drove to the school and tried to find a vantage point that would yield interesting light and an uncluttered view. I dragged the garbage can that was by the front door out of the way and got ready to capture the warm morning light. I was rewarded with a beautiful, golden morning glow. I took about fifty photos from several angles and then went home to thaw out my hands and process the images.

I plan on writing a detailed post outlining my work-flow from the moment the shutter is released until the image is either uploaded to the web or made into a print, but for now, the short version. I imported the images into Adobe Photoshop Lightroom, picked the best ones and then began to make modifications to the best images. First, I cropped the image to make a panoramic view and get rid of some of the flat blue sky. Next I bumped up the saturation to make the gold highlights pop, and boosted the blacks in order to increase the contrast. I was pretty happy with the overall image, but thought that it was still a little boring. Just for fun, I decided to save the image and then open it up in Gimp. Gimp is open-source (read "free") software and is very powerful. I've never used Photoshop CS3 or CS4 so I won't wade into the Gimp vs Photoshop debate, but Gimp is a credible alternative for the times when you need to "move" pixels. Once the image was open in Gimp, I selected the flat blue sky from the original photo. Once the sky was all selected, I did an inverse selection so that everything was selected except for the sky. Next I copied and pasted the school, trees, and foreground into this photo of a dramatic sky with clouds. Lastly I made some touch-ups to ensure that the edges of the building and leaves were natural looking.

Even though I was just messing around, I really like the final composite image. This was also the image chosen by the school administration for their publication. Not bad for a morning of having fun playing around with my camera and computer. I even got a $50 coffee card for my troubles. As always, click the "Comments" link to leave your 2 cents worth. I'd be curious to hear your thoughts on the merits of Gimp and Photoshop?

Wednesday, February 4, 2009

We've Come A Long Way Brownie

Astronomical Clock (1410) Prague, Czech Republic


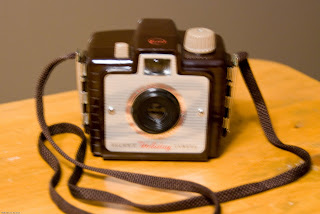
I just bought a new camera! It wasn't expensive, just 20 bucks on eBay, but to me it's a pretty special find. My new camera is exactly the same as my very first camera, the Kodak Brownie Holiday Camera, which I have referred to in earlier posts. It is pretty low-tech and doesn't have any settings, other than a winding knob and the shutter release. It consists of a brown bake-lite plastic light-proof box with a viewfinder and a shutter. I received my new camera in the mail today and was pleased to find that it is in almost mint condition. 

As I was admiring my new (vintage) camera and thinking about how much cameras have changed in recent years, I thought that I would use my new camera to demonstrate the effectiveness of the vibration reduction (VR) technology found in many new lenses. Just as a point of interest, "VR" is a Nikon term while Canon uses the "IS" (Image Stabilization) designation for their comparable technology. When I first started researching the Nikkor 18-200 mm VR lens, I was skeptical of the claims that people were making about VR lenses. Nikon claims that photographers can shoot at a full two stops slower shutter speed than with a non-VR lens. A general rule of thumb for shutter speed is that the inverse of the shutter speed should be greater than the focal length of the lens that you are shooting with. What this means in practical terms is if you are shooting at 65 mm, you should be shooting at a minimum of 1/60 th of a second in order to minimize camera shake and blur. I am absolutely amazed at the actual results of this lens. The above photo was shot hand-held at 65 mm, ISO 400, f/5.0 at 1/3rd of a second

This second photo was taken with exactly the same settings, but with the VR feature turned off. Click on each image to see a larger photo. I think the results of my demonstration clearly show the effectiveness of VR technology. The top image is not exactly "tack sharp" but it is usable. The second photo is definitely a reject. 

Does VR make my tripod obsolete? Definitely not. But when I am travelling light and want to maximize mobility, VR is a credible alternative. When we were in Dublin and Dresden last summer, we saw signs in several of the old cathedrals stating that tripods were not even allowed inside. VR allowed me to capture several photos in dim light conditions that would otherwise not have been possible like image of the astronomical clock taken on a dark and drizzly day in Prague, Czech Republic last July. 

As always, I appreciate and value your comments. I'd love to read your thoughts about VR or IS technology or your memories of your first camera. 

Friday, January 30, 2009

My Gear Pt. II

Got home late last night from an intimate concert with Martyn Joseph. My good friend Trent, was at a song writing workshop with Martyn and got to know him on a personal level. Martyn was coming over for a concert in Calgary and Trent asked if he would play for a group of about 50 friends. What an amazing evening! Good food, connecting with friends, and listening to an incredible musician. Martyn shared that he'd once had a review where the critic said, “Martyn Joseph makes Leonard Cohen sound like Julie Andrews.” OK, maybe his voice isn't the best, but he is a brilliant song writer and can he play the guitar. Amazing!

When I wrote, My Gear Pt. I, it was from the perspective of the decisions that I made in the fall of 2007 as I prepared for travel photography. In this post I will finish the discussion around the gear that I have purchased since our trip to Europe, and will conclude with what I would purchase if I was going to buy a digital SLR camera today.

I was very pleased with the gear that I purchased for our trip to Europe. You can view the best of my Europe pictures on my website at www.scottjantzenphotography.com. Most of my shooting was outside during the daytime, so I rarely had need for anything other than my Nikkor 18-200 mm VR lens. When we were at the Willie Clancy Traditional Music Festival in the dark pubs of Miltown Malbay in Ireland, I switched to my 50 mm f/1.4 and was able to take reasonable pictures with available light. One other piece of equipment that I purchased before our trip was a Nikon SB-24 Speedlight (from eBay for $70) and a set of Cactus wireless triggers, which I lugged all over Europe. I was very glad that I did for the one occasion when I really needed them, which was our evening Greek Feast with Thia Popi (Aunt Popi, portrait above) and Theo Nikos (Uncle Nikos). I've been an avid follower of Strobist, which is a blog dedicated to teaching photographers how to use small portable flash units, triggered off camera in order to create photos with dramatic lighting. Highly recommended!

Since getting back from our trip, I have been working at rounding out my photo equipment so that I can make better portraits with “interesting lighting” as opposed to the very flat, mug-shot type photos that you get with on camera flash photography. I've purchased a second flash, a Nikon SB-28 (again from eBay for $100), a light stand, umbrella, rechargeable batteries, gels to control the colour of the light from the flash, and a few other lighting tid-bits. I bought most of my stuff in a "strobist" kit through Midwest Photo Exchange. They were great to deal with, even for cross-border shopping. I also bought a Nikkor 85 mm f/1.8 lens, which is fast, bright and great for portraits where you have some room to work. I can get in nice and close to people's faces without being in their personal space like I would if using the 50 mm.

That's pretty much it for my collection of gear that I currently use. There is nothing that I have in my collection that I don't use on a regular basis and I don't regret any of the purchases that I've made. I think I did the best I could with the dollars available and the information at hand. That being said, if I were purchasing today instead of a year and a half ago, I'd buy the Nikon D90. The reason is the amount of noise that I get in blue skies and other similar dark even spaces with my D80. It is not a problem for normal photography, but the standards for iStock submissions are getting so stringent that it is getting harder and harder to get an image accepted. The quality of the sensors in Nikon cameras has improved dramatically over the past year and this has been incorporated into the D90. The D90 also still fits all of my original requirements that make for a great "travel" SLR camera. The other fantastic thing about the D90 is that it takes video! I'll link to Chase Jarvis where he shows a video demo of the D90, very cool. That's it for now. I'd be curious to hear your comments about the choices I've made and your experiences. Just click on the “Comment” button below. I've had a report of difficulty leaving comments. If that's your experience, please send me an email so I know.

Monday, January 26, 2009

My Style


Starting this photo blog has been excellent as it has caused me to reflect on my own practice as a photographer and think about why I do the things that I do. As a school administrator working with teachers, I use a similar process. If I can ask questions that cause a teacher to think and reflect on their practice, they will usually make changes to their practice and get better at what they do.

Over the past few days I've been thinking about my style as a photographer. I've already shared about some of my early work and the influence of my dad, but in retrospect, my oldest brother was also a significant force in my early thinking about photography and capturing the world around me. Older brothers are not always gentle in their feedback and I have clear memories of my brother viewing my prints and sorting them into two piles; acceptable and not. His primary criticism of my work was that the viewer's eye was not drawn to the subject of the photo (see the photo of a wasp's nest above ). Being a good teacher he followed up this constructive criticism by working with me to take better images that have a clear subject (see the "special effects" photo of my brother flying like Superman...notice how your eye is drawn right to the subject, and never mind that it is out of focus!). These lessons began to pay dividends as I began to work at subject placement and ensuring that the subject was clearly identifiable (as is evident in these two photos: on the right are my paternal grandparents in their back yard surrounded by flowers, and below is the farm house of my maternal grandparents ). I'm so thankful that I found my photo album with these images from my childhood, and to my brother for his constructive criticism, tutoring, and support.

One year ago I began to submit my work to iStock photo which is a micro-stock photo agency that acquires images from photographers, sells them at reasonable prices, and pays the contributing photographer a small amount per download. I have no illusions of getting wealthy by submitting to iStock, but it has been incredibly useful as a learning and motivational tool. When I started taking digital photos, I began to wonder what I was going to do with all of the photos that were beginning to clog up my hard drive and I was a little concerned that I would lose interest and my new camera gear would begin to gather dust along with my fly-fishing equipment.
The challenge of first, getting accepted as an iStock contributor, second, getting photos accepted into the iStock collection, and third, actually selling some photos, kept me learning and motivated. Shooting for stock has also shaped my style as a photographer. When I am shooting for stock I try to ensure that the subject is "tack sharp" that it is visually interesting and that the exposure is perfect. Often when I am shooting I hear my brother's voice saying, "What is the subject?".


Friday, January 23, 2009

My Gear Pt. I


Let me begin by quoting Scott Bourne from This Week in Photography, "Nobody makes bad lenses or bad cameras anymore." That being said, I researched my camera gear very carefully before I purchased it in the fall of 2007. My decisions were based on the fact that we would be traveling to Europe in the summer of 2008, and I wanted to travel light. I also wanted to maximize the quality of equipment for the least amount of money (which is always more than you've budgeted when you are buying camera gear). I spent considerable time in camera stores, handling cameras from both Canon and Nikon. I didn't consider other manufacturers as I wanted to be able to access the large number of used lenses, speedlights, and other accessories available. I settled on the Nikon D80 because I really liked the way it fit my hands and the controls were intuitive to operate. My next decision after deciding on the D80 body was what lens to buy. I was tempted to purchase the inexpensive "kit" lens, but decided instead on purchasing the best glass I could afford. I settled on the Nikkor 50 mm f/1.4 and have been very happy with this compact, very fast and high quality lens.
I especially like the shallow depth of field that is achieved by shooting with a large aperture, resulting in a smooth, silky background. Whenever I purchase a new lens I also buy a high quality UV filter which protects the front element of the lens from dust and scratches.
I spent the next few months taking hundreds of photos with my new system, getting to know the controls, options, and settings. I found this combination of camera body and lens to be excellent for many types of photography, but found myself getting frustrated with not being able to "bring in" many subjects because of the short focal length. I knew that I would soon be looking for a longer focal length zoom lens. While I was saving up for my next lens I purchased several additional memory cards, an extra battery, and a remote shutter release so that I could take long exposure photographs with the camera mounted on a tripod.
In November of 2008 I began shopping for a zoom lens that would cover a decent range and still be compact and high quality. I did lots of research and after much consideration chose the Nikon 18-200 f/3.5-5.6 VR lens. I really like this lens. I've taken about 90% of my photos with this lens and it is as close to an "all-in-one" that you could hope to get. Having the full range of focal lengths from wide-angle to moderate zoom in one lens does not come without some sacrifice in sharpness, speed and minor darkening of the corners at 28 mm. With this pair of lenses, the 18-200 mm and the fast 50 mm I was almost set for travel photography.
To round out my gear I acquired a good quality circular polarizing filter to fit the 18-200 and a 120 GB Hyperdrive Colorspace, which is a portable hard drive with a screen and built in card reader. This device was perfect for storing my digital photos so that I could clear off my cards and keep shooting. This particular model is quite reasonably priced and the internal rechargeable battery can be charged with a USB cable, AC adapter, and a car charger. I also took along a second portable hard drive which I used to backup the Hyperdrive whenever I had access to a computer.
My last purchase before our trip was a good quality camera backpack. I looked at several LowePro bags but I wasn't happy with the quality of the stitching and velcro closures. I tried out one bag in a local camera store and as I opened a velcro tab, the stitching let loose. Not impressed. I ended up choosing the Customary Barge backpack from Crumpler. I like this bag because it looks like a regular backpack instead of a camera bag. The bottom half has storage for a SLR camera, an extra lens and some accessories. The top portion has enough room for my rain gear and odds and ends. It also has a full padded sleeve for a laptop which can accomodate my Toshiba Tecra laptop. About a month after I bought my backpack, I stepped on one of the buckles for the waist belt and broke it. I sent the good folks at Crumpler an email and they sent me a free replacement waist belt. I was very impressed with their customer service.

Thursday, January 22, 2009

Anything That Reflects Light

I'm often asked, "So what do you shoot?" My answer is usually along the lines of "Anything that reflects light!" One of my favorite things to do is to get up early in the morning, grab a cup of coffee in a travel mug and head west of High River into the foothills of the Rocky Mountains. One morning, late last August, I happened upon a group of five cowboys in the process of moving a heard of cattle from one pasture, across the road, to an adjacent section of pasture. The light was warm, the air was cool and these quiet gentlemen nodded affirmation when I motioned that I would like to make photos of them. I took this photo just after they crossed the road and headed down into a gully. This cowboy stopped for a few moments to appreciate the peaceful morning and take in the mountain view. Taken at 1/60, f /5.6, ISO 100 at 200mm with my trusty 18-200 VR lens.

Freedom

I've been making pictures for a long time. I got my first camera, a Kodak Brownie Holiday Camera, when I was about seven years old. I got the camera from my dad who has been an avid photographer for as long as I can remember. As I was reflecting about my start in photography, I remembered that I still have a photo album with shots in it from that first camera buried in a box in the basement. The above shot is from one of my first rolls of film, taken with that camera. I don't remember exactly when or where it was taken, but it must have been on one of our many family road trip vacations in the mid 1970's. (In talking on the phone with mom and dad, it must have been taken around Cardston, AB on our way to the Black Hills in South Dakota in 1971). My dad was a teacher and my mom worked at the local public library. In the summer our holidays consisted of driving, camping, and seeing the sights. This photograph is special to me because it is so similar to many recent photos that I have made since resuming my photography with a digital SLR camera. There's something about an open road and a beautiful landscape that is the essence of freedom. When it is cold outside in January, I often think about packing up our tent trailer and heading off on a road trip with my family. I'm so grateful to my mom and dad for the lifestyle they led and to my dad for sharing his love of photography with me.

This photograph was taken on Highway 40, just north of Highwood House in Kananaskis Country, Alberta. It was taken with my Nikon D80, Nikkor 18-200 mm VR lens at 18 mm, 1/100, f /9.0 and ISO 200. I'm eagerly watching the mailbox as I just purchased a vintage Brownie from eBay. I can't wait to get it.

Tuesday, January 20, 2009

Big Rig at Sunrise


For the past while, as I drive to work in the morning there is one particular view that catches my breath. At this spot the vehicles on the highway are silhouetted against the morning sky and their tires appear to be just barely touching the pavement. Each morning I try to be in place at 7:50 am to see the show. The challenge of how to capture this scene has occupied my thoughts for weeks, and when a big rig rolls by I want to capture the moment. This past Saturday I parked my van and got out my camera. At 100 ISO and maximum aperture my shutter speed had to be at 1/13th of a second. It was pretty cold and I didn't want to be standing there for long so I squeezed off about 15 frames in about 10 minutes. With my fingers freezing I worked at carefully panning to ensure that the vehicles remained as sharp as possible. This photo was the best of two photos I made that featured semi-trailer units.

Comments and questions are welcome.

What it's about

I am a photographer and a teacher. My full-time job is working as a vice-principal of a junior high school. In between my roles of husband, father and educator, I make photographs and learn about photography. I learn by doing, reading books, magazines and websites, listening to podcasts, and reading the blogs of other photographers. I love learning new things and then distilling this information down to a usable form and then sharing it with others. That is what this blog is about. My goal is to share my photography, new techniques, cool resources that I've found, and my thoughts on why I enjoy photography. If you have thoughts or feedback, please leave a comment or send me an email.
 
Custom Search